Browning Trail Cameras offer reliable scouting solutions; instruction manuals are readily available online, easily located by the model number found on the camera itself.
What are Browning Game Cameras?
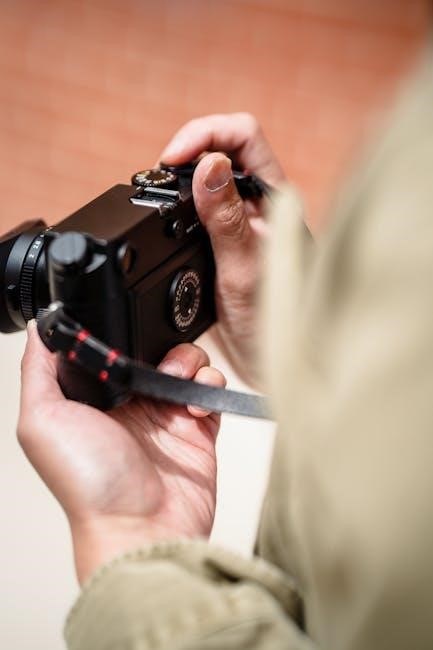
Browning Game Cameras, also known as trail cameras, are remotely operated cameras designed for wildlife observation and security purposes. These devices are invaluable tools for hunters, researchers, and property owners alike. They automatically capture images or videos when motion is detected, providing a glimpse into animal activity patterns without direct human presence.
Browning offers a diverse range of models, from basic cameras to advanced wireless options, each with varying features and capabilities. Accessing the correct instruction manual – easily downloadable from resources like ManualsLib – is crucial for understanding your specific camera’s functions. The model number, typically located on the rear of the camera or inside the front door, is key to finding the appropriate guide.
Why Use a Browning Game Camera?
Browning Game Cameras provide numerous benefits for various users. Hunters utilize them to scout locations, identify animal travel routes, and estimate herd sizes, ultimately improving hunting success. Researchers employ these cameras for wildlife population studies and behavioral analysis. Property owners benefit from enhanced security, monitoring for trespassers or unwanted animal activity.
Understanding your camera’s features, detailed in the instruction manual, maximizes its effectiveness. Knowing how to adjust settings like trigger speed and image quality – information readily available online – ensures optimal performance. Correct setup, guided by the manual, guarantees reliable data collection and peace of mind, whether for recreational or professional purposes.
Understanding Your Camera Model
Identifying your Browning camera’s model is crucial; the model number is conveniently located on the camera’s rear or inside the front door.
Locating the Model Number
Pinpointing your Browning game camera’s specific model number is the first step towards accessing the correct resources and support. This unique identifier unlocks a wealth of information, including detailed instruction manuals and troubleshooting guides. Fortunately, Browning makes locating this number straightforward.
Typically, you’ll find the model number prominently displayed on the rear housing of the camera itself. Carefully inspect the back panel; it’s usually printed directly onto the plastic. Alternatively, and especially useful if the rear label is obscured, the model number is also located inside the front door of the camera. Simply open the front access panel, and you should find the identifying information clearly visible. Having this number handy will streamline your access to online manuals and support materials;
Accessing Online Manuals
Once you’ve identified your Browning game camera’s model number, obtaining the corresponding instruction manual is remarkably easy. Browning provides convenient access to digital manuals directly through their online resources. Numerous websites, such as ManualsLib, host downloadable versions of these guides, including the Strike Force BTC-5HD model.
Simply navigate to these websites and utilize the search function, entering your camera’s specific model number. The correct manual will quickly appear, allowing you to download it for offline viewing. Browning also provides direct links to manuals for Defender and Wireless models on their official website. These manuals offer comprehensive guidance on setup, operation, and troubleshooting, ensuring you get the most out of your trail camera.
Camera Setup and Initial Configuration
Begin by carefully inserting batteries and an SD card, referencing your Browning game camera manual for specific instructions and compatibility details.
Inserting Batteries
Proper battery installation is crucial for optimal performance. Your Browning game camera manual will detail the specific battery type required – typically AA batteries, though some models may use others. Ensure you insert the batteries with the correct polarity, matching the positive (+) and negative (-) markings inside the battery compartment.
Always use fresh batteries, and it’s recommended to replace all batteries at once, rather than mixing old and new ones. This helps maintain consistent power delivery. Before closing the battery door, double-check the alignment and ensure a secure fit. A loose connection can prevent the camera from powering on or cause intermittent operation. Refer to the manual’s diagrams for visual guidance if needed.
Inserting SD Card
An SD card is essential for storing images and videos captured by your Browning game camera. Consult your camera’s manual to determine the compatible SD card type and maximum capacity supported. Gently insert the SD card into the designated card slot, usually located under a protective door.
Ensure the card clicks securely into place. Avoid forcing the card, as this could damage the card or the camera’s slot. Before fully closing the SD card compartment door, briefly check that the card is properly seated. Formatting the SD card within the camera’s menu is recommended for optimal performance and compatibility. Always eject the card safely before removing it from the camera.
Powering On the Camera
After inserting the batteries and SD card, powering on your Browning game camera is straightforward. Locate the power button, typically found on the camera’s control panel. Press and hold the power button for a few seconds until the camera’s display illuminates.
The screen will display the camera’s status and menu options. If the camera doesn’t power on, double-check the battery polarity and ensure they are fully charged. Refer to your specific model’s manual for the exact location of the power button and any initial setup prompts that may appear upon startup. A successful power-on indicates readiness for configuration.
Navigating the Camera Interface
Browning cameras feature intuitive menus; understanding button functions and controls, detailed in the manual, allows easy access to settings and customization options;
Understanding the Menu System
Browning game camera menu systems are designed for user-friendliness, though navigating them effectively requires familiarization. The manual is your key resource, detailing each menu option and its corresponding functions. Expect to find sections for image/video settings, trigger adjustments, date/time configuration, and camera operation modes.
Typically, menus are accessed via dedicated buttons on the camera’s control panel. Use these buttons to scroll through options and select desired settings. Pay close attention to sub-menus, as many features are nested within multiple layers. The manual will illustrate the menu structure, preventing confusion and ensuring optimal camera performance. Understanding the menu system unlocks the full potential of your Browning trail camera.
Button Functions and Controls
Browning game cameras utilize a set of buttons for operation, each with specific functions detailed in the camera’s manual. Common controls include a power button, menu navigation buttons (up, down, left, right, and OK/select), and potentially a dedicated test button. The manual clearly illustrates the button layout and explains each function’s purpose.
Understanding these controls is crucial for efficient camera setup and operation. The menu navigation buttons allow you to scroll through settings, while the OK/select button confirms your choices. Refer to the manual for specific button combinations that may activate advanced features or troubleshooting options. Mastering these controls ensures seamless interaction with your Browning trail camera.
Image and Video Settings
Browning cameras offer adjustable resolution and quality options, alongside trigger speed and recovery time settings, all detailed within the comprehensive user manual.
Resolution and Quality Options
Browning game cameras provide users with a variety of resolution and quality settings to tailor image and video capture to their specific needs and storage capacity. The manual details how to adjust these parameters, impacting file size and clarity. Higher resolutions, like those offered on the Strike Force BTC-5HD, deliver sharper images but require more SD card space.
Users can typically choose from multiple megapixel options for photos and various resolutions (e.g., 720p, 1080p) for videos. Quality settings often allow selection between different compression levels, balancing image fidelity with storage efficiency. Understanding these options, as explained in the camera’s instruction manual, is crucial for optimizing performance and managing data effectively.
Trigger Speed and Recovery Time
Browning game camera manuals emphasize the importance of understanding trigger speed and recovery time for effective wildlife monitoring. Trigger speed refers to how quickly the camera captures an image or video after detecting motion, crucial for capturing fast-moving animals. Recovery time is the interval the camera needs before it can trigger again.
Faster trigger speeds minimize the chance of missing action, while shorter recovery times ensure continuous monitoring. The manual details how to adjust sensitivity settings to optimize these parameters based on the environment and target species. Balancing these settings is key; high sensitivity can lead to false triggers, impacting battery life and data storage.
Image/Video Modes (Photo, Video, Hybrid)
Browning game camera manuals thoroughly explain the available imaging modes: Photo, Video, and Hybrid. Photo mode captures still images, ideal for quick identification. Video mode records moving subjects, providing detailed behavioral insights. Hybrid mode intelligently switches between photo and video, maximizing data efficiency.
The manual guides users on selecting the appropriate mode based on scouting goals. It details how to configure recording lengths for videos and burst settings for photos. Understanding these options allows for tailored data collection, conserving storage space while capturing essential wildlife activity. Proper mode selection is vital for effective trail camera operation.
Advanced Camera Features
Browning camera manuals detail features like time-lapse, multi-shot, and remote viewing (on wireless models), enhancing scouting capabilities and data collection.
Time-Lapse Photography
Browning game camera manuals thoroughly explain the time-lapse feature, allowing users to capture changes in a location over extended periods. This function is ideal for observing animal patterns, plant growth, or weather shifts. The manual guides you through setting the interval – the time between each captured image – ranging from seconds to hours, depending on the desired observation timeframe.
Understanding the manual’s instructions on time-lapse mode ensures optimal battery life, as frequent image capture consumes more power. It also details how to configure the number of images taken during each interval and the total duration of the time-lapse sequence. Properly utilizing this feature provides a condensed visual record of activity, offering valuable insights for scouting and wildlife management.
Multi-Shot Mode
Browning game camera manuals detail the multi-shot mode, a valuable tool for capturing animal movement sequences. This feature allows the camera to take multiple images with each trigger event, increasing the chances of capturing a clear photo of a fast-moving animal. The manual explains how to adjust the number of shots per trigger, typically ranging from one to six images.
Understanding the settings within the manual helps optimize battery life and SD card space. More shots per trigger consume more resources. The manual also clarifies how multi-shot mode interacts with other settings, like recovery time, ensuring optimal performance for specific scouting scenarios. Utilizing this mode effectively provides a comprehensive record of animal activity.
Remote Viewing Capabilities (Wireless Models)
Browning’s wireless game camera manuals thoroughly explain remote viewing setup and operation. These models utilize cellular or Wi-Fi connectivity to transmit images and videos directly to your smartphone or computer. The manual guides users through activating the camera’s SIM card (cellular models) and connecting to a Wi-Fi network.
Detailed instructions cover downloading the necessary Browning app, creating an account, and linking the camera to your device. Troubleshooting sections address common connectivity issues. The manual emphasizes data plan requirements for cellular models and provides guidance on managing image transmission frequency to optimize data usage and battery life.
Troubleshooting Common Issues
Browning game camera manuals provide solutions for problems like power failures, poor image quality, and connectivity issues with wireless models, ensuring optimal performance.
Camera Not Powering On
If your Browning game camera fails to power on, consult the instruction manual for specific troubleshooting steps. First, verify that the batteries are correctly installed, observing proper polarity (+ and -). Ensure the batteries themselves are fresh and have sufficient charge; even new batteries can sometimes be defective.
Next, check the battery compartment for any corrosion or debris that might be interrupting the connection. A damaged power switch or internal wiring could also be the culprit, potentially requiring professional repair. The manual will detail any specific reset procedures for your model. Finally, confirm the SD card is properly inserted, as some cameras won’t power on with a faulty or missing card.
Poor Image Quality
Experiencing blurry or unclear images with your Browning camera? Refer to your camera’s manual for guidance on optimizing image settings. Begin by verifying the camera lens is clean and free of obstructions like leaves or spiderwebs. Adjust the resolution settings; higher resolutions generally yield sharper images but consume more storage space.
Check the trigger speed and recovery time settings, as fast speeds can sometimes compromise image clarity. Ensure sufficient ambient light; consider using a camera with enhanced low-light capabilities for nighttime images. The manual will explain how to adjust these settings. Finally, confirm the SD card isn’t full or damaged, as this can affect image quality.
Connectivity Problems (Wireless Models)
Encountering issues connecting your Browning wireless camera? Your camera’s manual is the first resource. Verify the camera is within range of your Wi-Fi network or cellular signal, depending on the model. Double-check the entered network credentials (password, SSID) for accuracy. Ensure the camera’s antenna is securely attached and properly positioned for optimal signal reception.
Consult the manual for specific troubleshooting steps related to your model’s connectivity features. Resetting the network settings on the camera can often resolve connection issues. Confirm your mobile device meets the minimum system requirements for the Browning app. Finally, check for firmware updates, as these often include connectivity improvements.

Maintaining Your Browning Game Camera
Proper care extends camera life. The manual details cleaning procedures, optimal storage conditions, and strategies for maximizing battery performance in various environments.
Cleaning and Storage
Maintaining your Browning game camera’s physical condition is crucial for longevity and optimal performance. Refer to your specific camera’s manual for detailed cleaning instructions, as certain solvents could damage the lens or housing. Generally, a soft, dry cloth is sufficient for removing dust and debris.
Avoid using harsh chemicals or abrasive cleaners. When storing the camera for extended periods, remove the batteries to prevent corrosion and potential damage. Store the camera in a cool, dry place, protected from extreme temperatures and humidity. A protective case can offer additional safeguarding against physical impacts and environmental factors. Proper storage ensures your camera is ready for the next scouting adventure.
Battery Life Optimization
Maximizing battery life is essential for remote scouting with your Browning game camera. Your camera’s manual details specific power-saving features; utilizing these will significantly extend operational time. Consider using lithium batteries, known for their superior performance in cold weather and longer lifespan compared to alkaline batteries.
Reduce the frequency of image capture or video recording, and adjust trigger sensitivity to minimize unnecessary activations. Disable features like wireless data transmission when not actively monitoring the camera. Regularly check battery levels and replace them proactively to avoid missed opportunities. Proper battery management ensures consistent performance during critical scouting periods.
Downloading and Viewing Images/Videos
Accessing your captured content is simple: use an SD card reader connected to your computer, or explore wireless data transfer options if your model supports it.
Using an SD Card Reader
Retrieving your images and videos using an SD card reader is a straightforward process. First, carefully remove the SD card from your Browning game camera, ensuring the camera is powered off to prevent data corruption. Locate the SD card slot on your computer – it’s often on the front or side panel.
Gently insert the SD card into the reader, and then connect the reader to a USB port on your computer. Your computer should automatically recognize the SD card as a removable drive. Open the drive to access the folders containing your photos and videos. You can then copy these files to your computer for viewing, editing, or sharing. Remember to safely eject the SD card from your computer before physically removing it to avoid potential data loss.
Wireless Data Transfer Options
Browning’s wireless models offer convenient ways to access your captured content without physically retrieving the SD card. These cameras often utilize Bluetooth or cellular connectivity for data transfer. Check your specific model’s manual for compatible apps – typically available for both Android and iOS devices.
Through the app, you can remotely view images, download videos, and even adjust camera settings. Some models may require a data plan or subscription for cellular connectivity. Ensure your camera is within range of a Bluetooth signal or has sufficient cellular coverage for reliable data transmission. Explore the app’s features to optimize your wireless experience.